Last Updated on February 13, 2021
After you have installed Ubuntu 20.04 LTS Desktop in VirtualBox, the first thing that you will notice is that Ubuntu desktop does not occupy the whole VirtualBox window no matter how you resize the window. To solve this we need to install VirtualBox Guest Additions.
Once we install the VirtualBox Guest Additions we will have access to the following features in Ubuntu 20.04 LTS Focal Fossa.
- Shared clipboards – able to do copy & paste from Host computer to Virtual Machine and vice versa.
- Shared folders – able to share files via a shared folder from Host computer to Virtual Machine and vice versa.
- Better video support – able to support higher resolution screens such as Full HD. Virtual Machine screen will resize automatically to the size of the VirtualBox window.
- Seamless windows – able to make Virtual Machine application windows to appear side-by-side with Host Machine application windows like it was part of the Host Machine.
- Time synchronization – better time synchronization with the host machine.
- Automated logins – able to do username and password passing from Host Machine to Virtual Machine.
- Generic host / guest communication channel – able to control and monitor guest execution.
To know more about Guest Additions, you can read VirtualBox’s documentation.
To install VirtualBox Guest Additions in Ubuntu follow the guide below.
Step-by-step instructions to install VirtualBox Guest Additions in Ubuntu 20.04 LTS Desktop
Installation of build-essential package
VirtualBox Guest Additions requires the build-essential package to be first installed in Ubuntu.
To install the build-essential package, open a terminal by typing Ctrl + Alt + t.
Then run the commands below.
sudo apt updateEnter your password when asked.
sudo apt install -y build-essentialWait until the installation is finished.
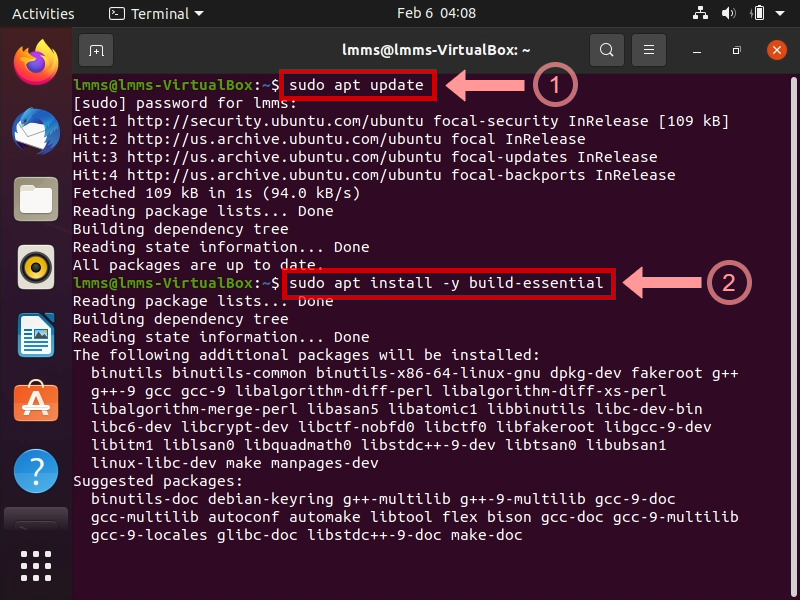
build-essential package in terminal.Installation of VirtualBox Guest Additions
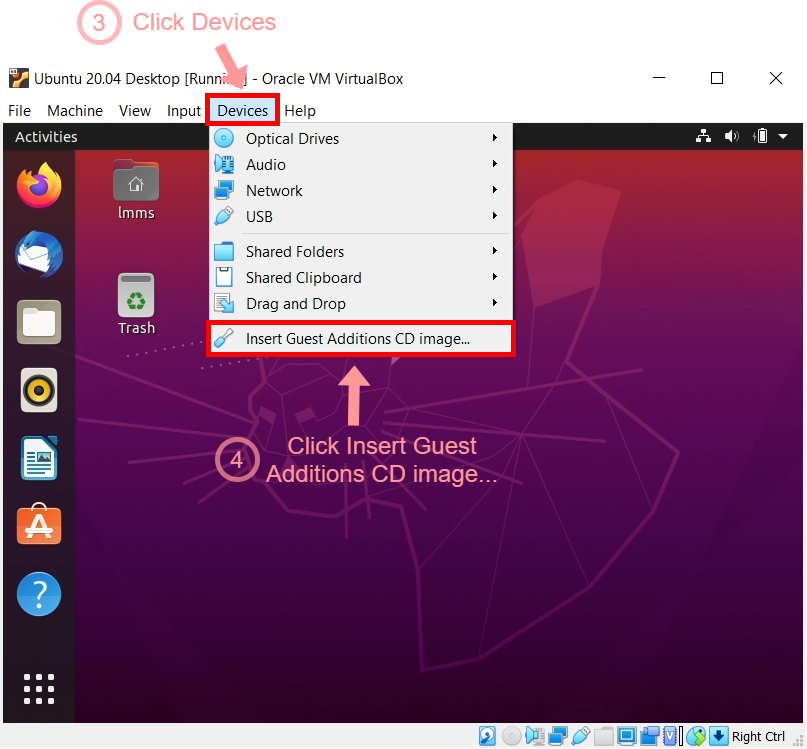
Load the Guest Additions CD Image by click Devices >> Insert Guest Additions CD Image....
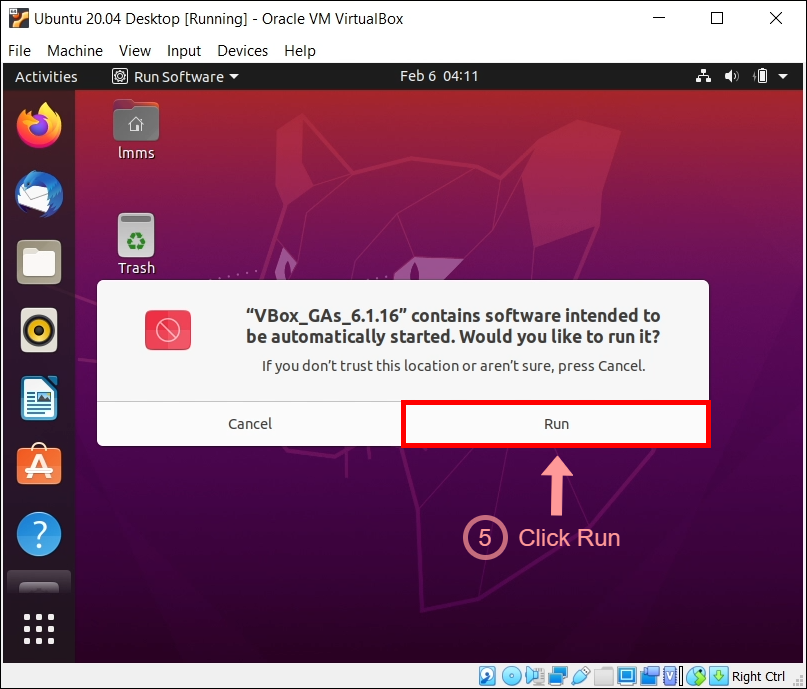
A window will then appear if you would like to run VBox_GAs_x.x.xx. Click Run.
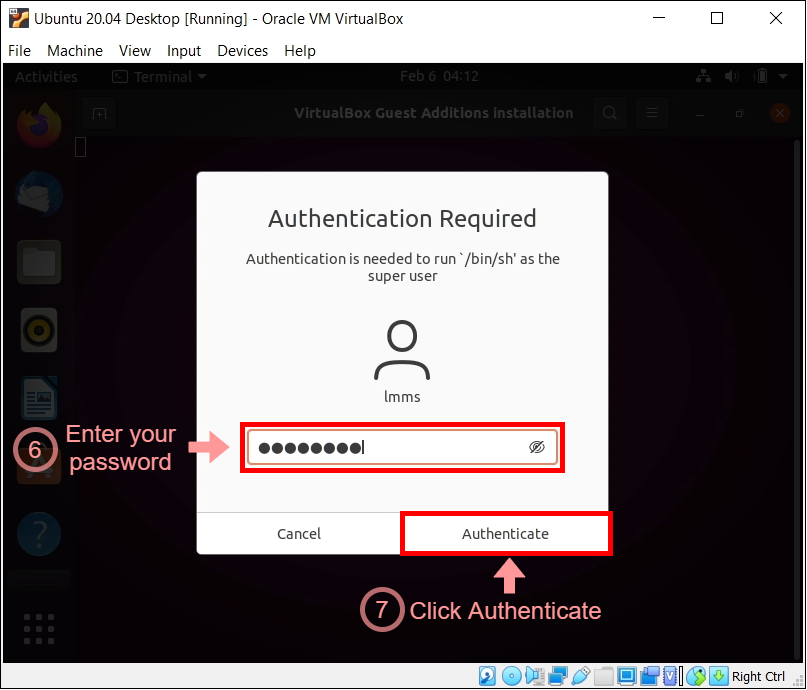
This will then ask you to authenticate by providing your password. Then click Authenticate.
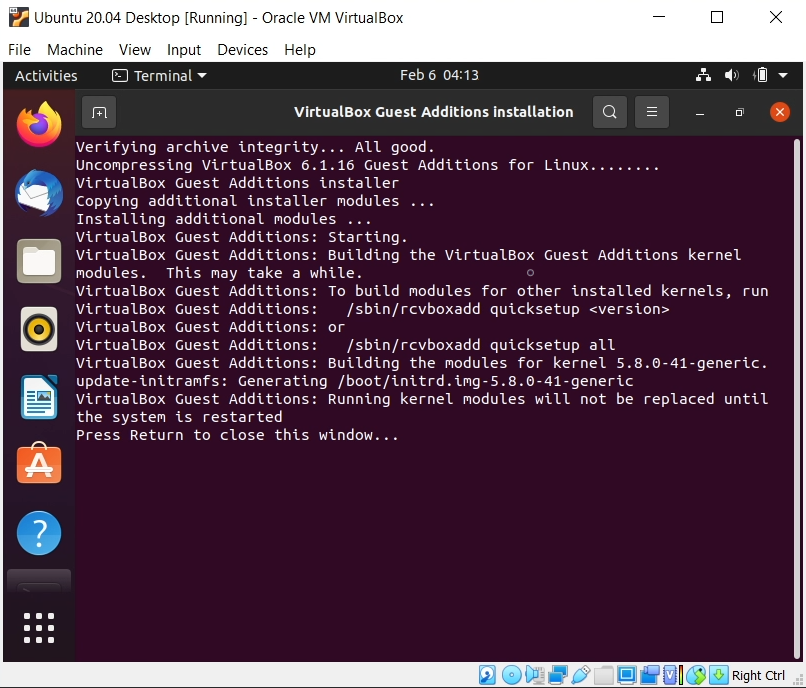
This will then open a terminal showing that the VirtualBox Guest Additions is being installed. Wait until this is finished.
Once you see Press Return to close this window... it means that VirtualBox Guest Additions has been installed but for it to take effect, we will need to restart Ubuntu.
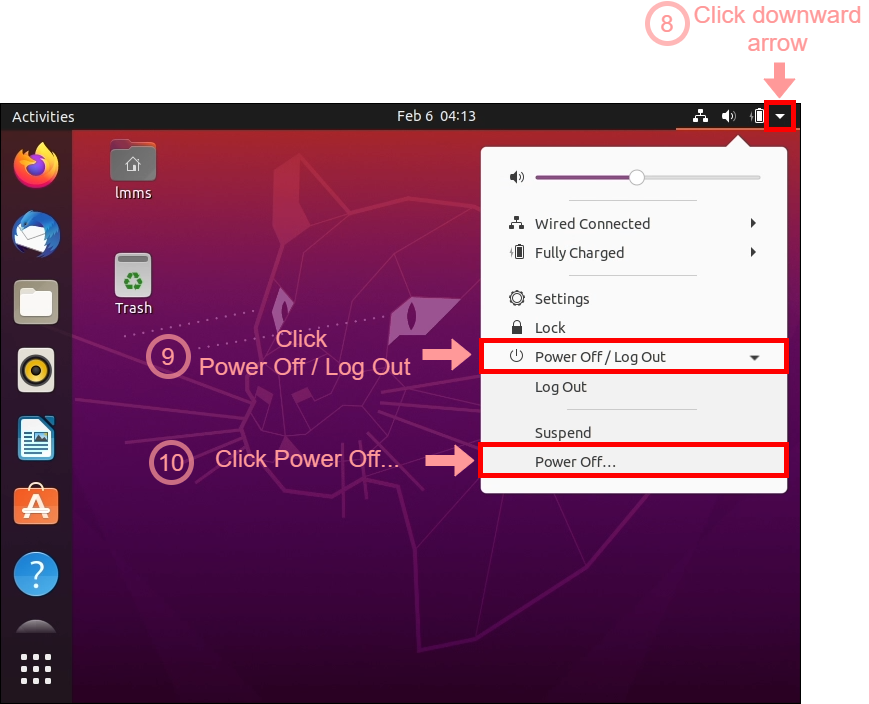
To restart Ubuntu, click on the downward arrow on the upper-right corner. Then click Power Off / Log Out. Then click Power Off....
Click Restart.
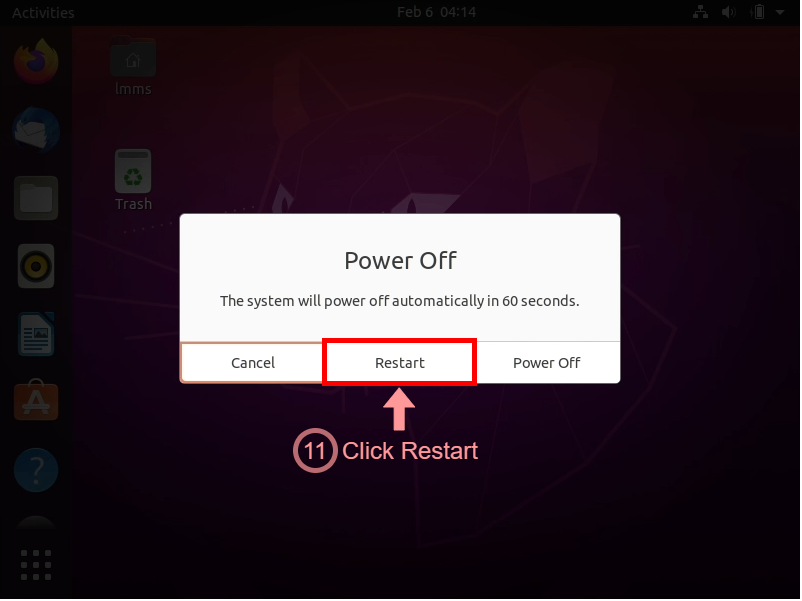
This will restart Ubuntu. Wait for the Login screen to appear.
Login by clicking on your username and entering the password.

Once you have finished login, Ubuntu desktop will now automatically resize to the size of your VirtualBox window, even if you maximize the window.
This shows that we have successfully installed VirtualBox Guest Additions in Ubuntu 20.04 LTS Desktop.