Last Updated on February 13, 2021
Below is a detailed tutorial on how you can install and run the Ubuntu 20.04 LTS (Focal Fossa) Desktop in Oracle VM VirtualBox.
- Downloading the Ubuntu 20.04 LTS Desktop Installer Disk Image
- Creation of new Virtual Machine in VirtualBox
- Loading the Ubuntu Installer to the Virtual Machine
- Installation of Ubuntu 20.04 LTS Desktop
- Running Installed Ubuntu for the first time
The tutorial below was run on VirtualBox running in Windows 10. But if you are running VirtualBox in Mac or Linux, the instruction should be the same.
Step-by-step instruction on how to run Ubuntu 20.04 LTS (Focal Fossa) Desktop in VirtualBox
Downloading of the Ubuntu 20.04 LTS Installer ISO Disk Image
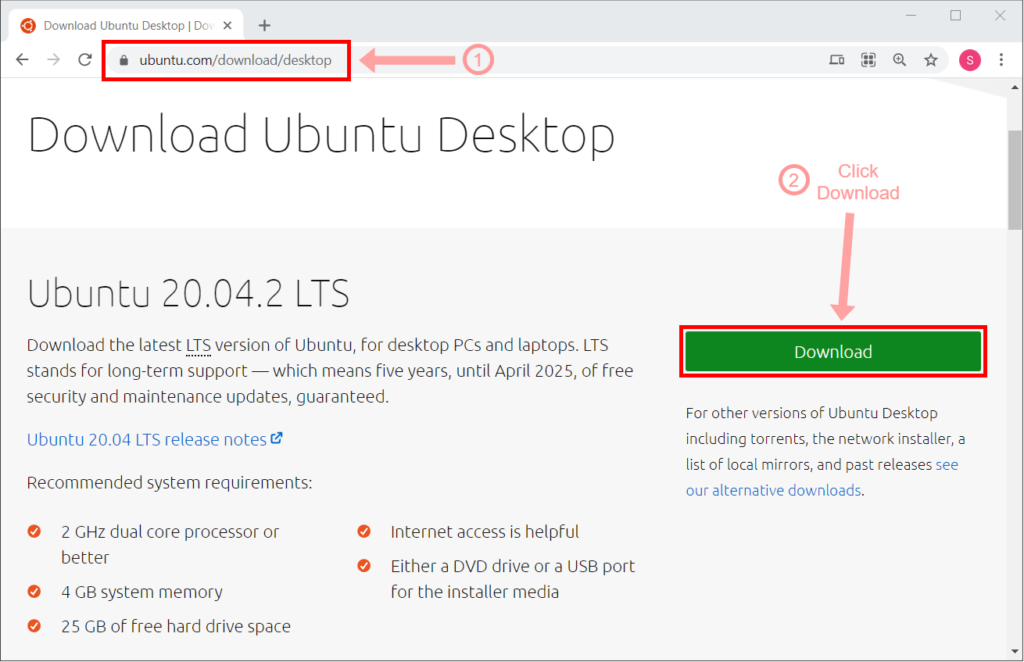
Go to ubuntu.com/download/desktop.
On Ubuntu 20.04 LTS click Download.
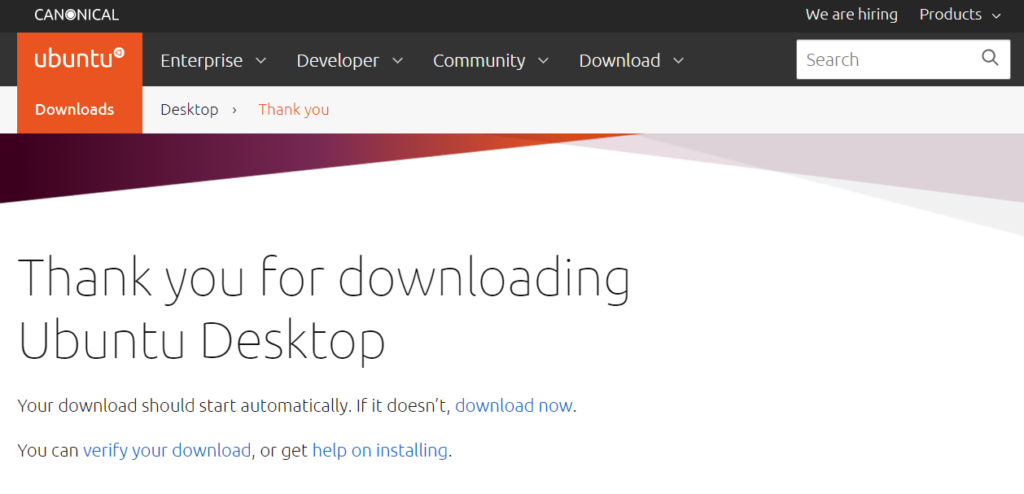
This will then move to a web page saying “Thank you for downloading Ubuntu Desktop”. Wait for a while then download of ubuntu-20.04.x-desktop-amd64.iso will start automatically.
Once download has finished, note the location of where you downloaded the ubuntu iso file.
Creation of new Virtual Machine in VirtualBox
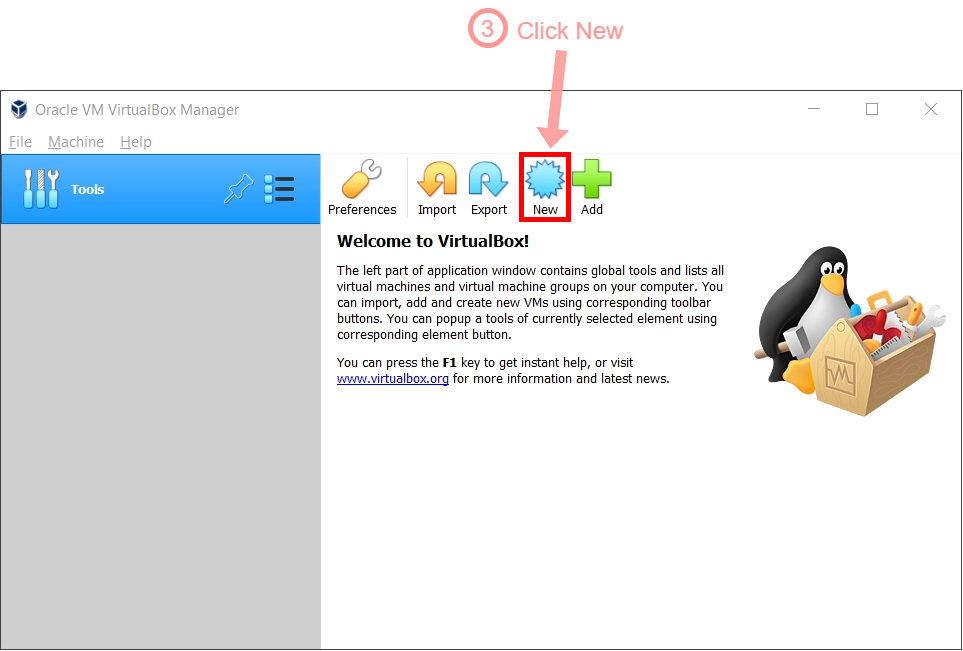
Open Oracle VM VirtualBox. Then click New.
The Create Virtual Machine window will appear.
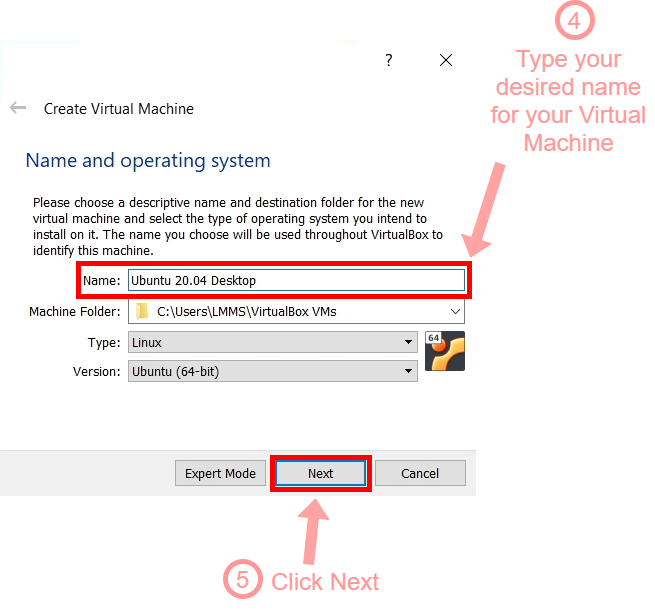
Enter the Name that you want for your Virtual Machine, then click Next.
Adjust the Memory Size.
Recommended memory size according to the Ubuntu Desktop documentation is 4096 MB (4 GB).
Click Next.
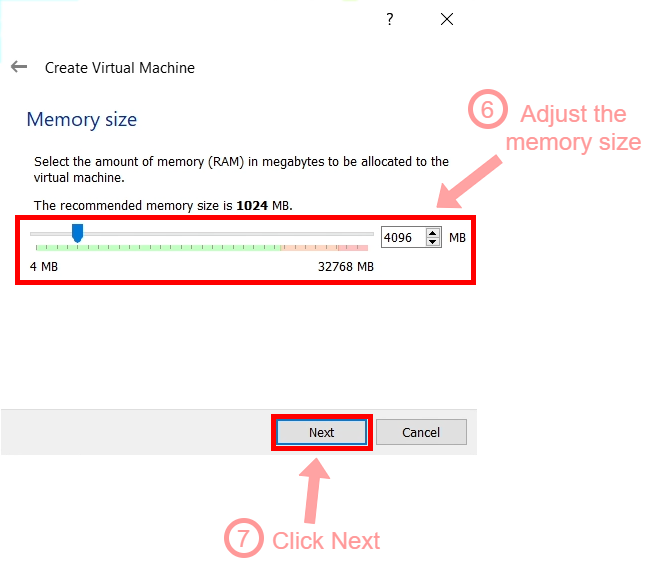
Personally, I tried using the 1024 MB (1 GB) memory and it was super slow. When I upgraded it to 4GB, the Ubuntu 20.04 LTS Desktop Virtual Machine became fast.
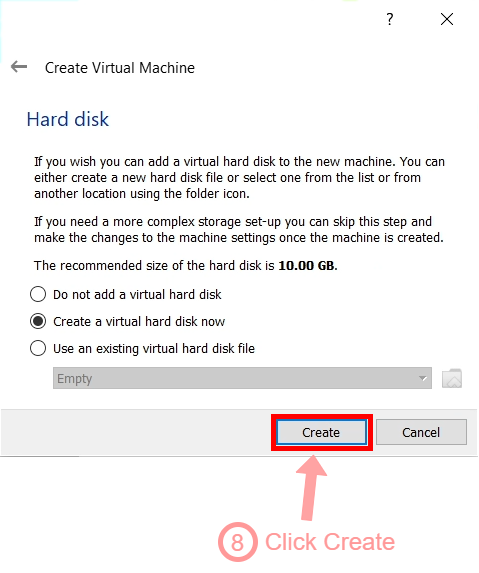
For Hard disk, leave the option on Create a virtual hard disk now. Click Create.
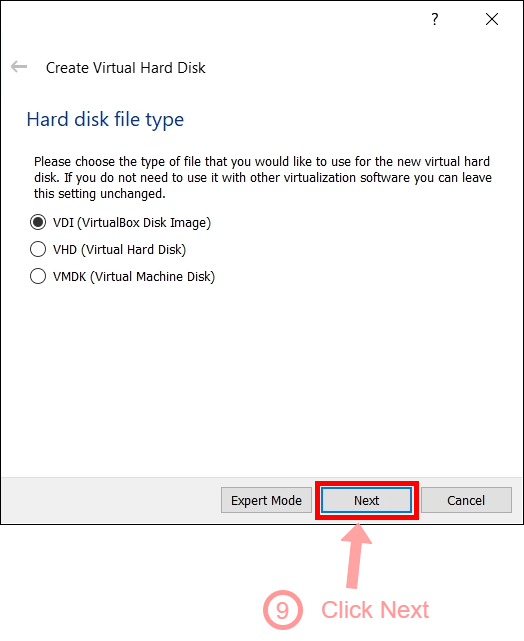
For Hard disk file type, leave the option on VDI (VirtualBox Disk Image). Click Next.
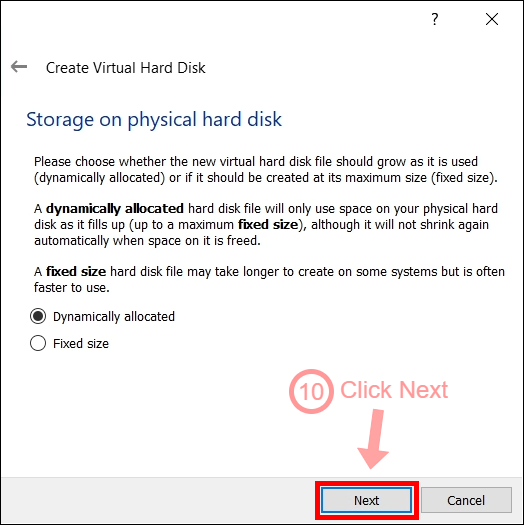
On Storage on physical hard disk, leave the option on Dynamically allocated. Then click Next.
On File location and size, select desired Hard Disk size. Then click Create.
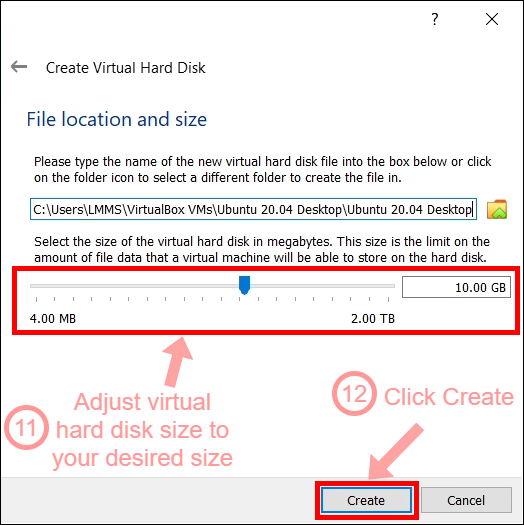
The documentation says that the recommended size is 25 GB. Since I’m not really going to store a lot of files in my Ubuntu 20.04 Virtual Machine, I decided to just stick with 10 GB. So far no problems encountered with the 10 GB hard disk size.
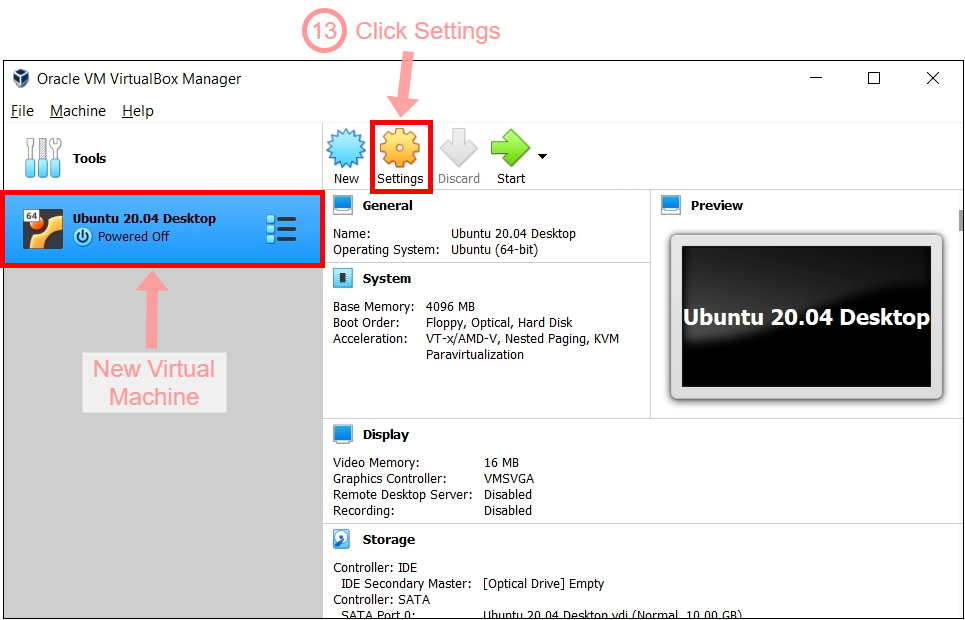
This will go back to the VirtualBox Manager and we will now see that the Virtual Machine is now created but it is powered off.
Loading the Ubuntu Installer ISO Image File
Before we start the new Virtual Machine, we need to load the ubuntu-20.04.x-desktop-amd64.iso we downloaded earlier to the virtual optical disk drive. Think of it as loading an installer to a CD/DVD Drive.
To do this, click on Settings.
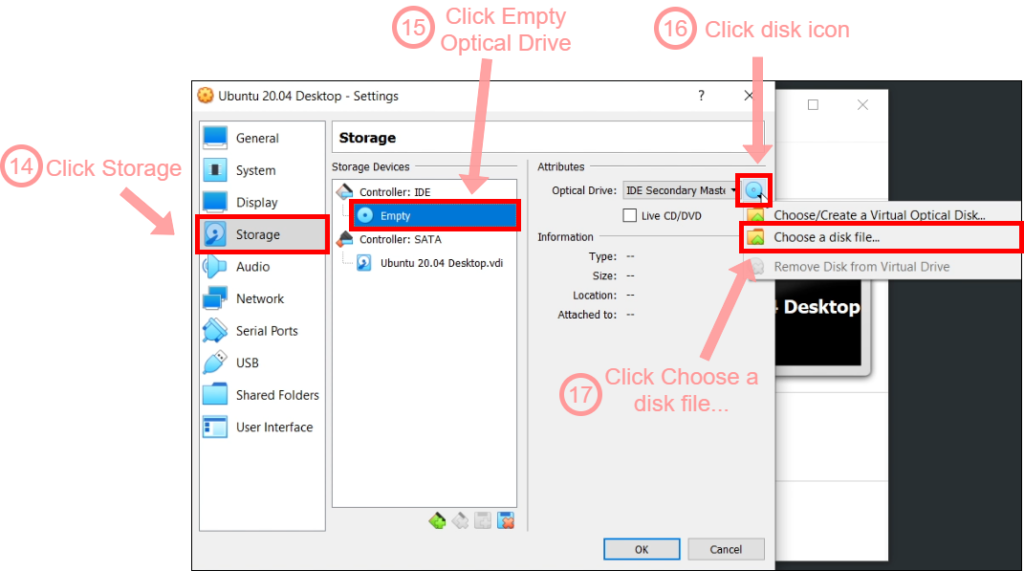
The Settings window will then appear, click on Storage.
Then click on the Empty optical drive under Controller: IDE.
Click on the small disk icon. A dropdown menu will appear.
Then click Choose a disk file....
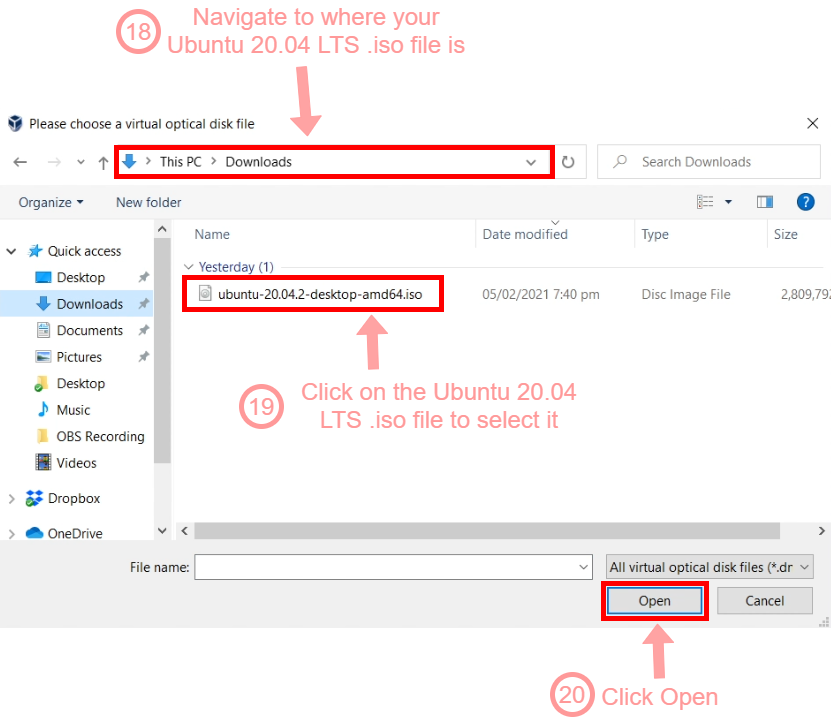
The file selection window will appear. Go to the folder where you downloaded the ubuntu 20.04 .iso file is.
Click ubuntu-20.04.x-desktop-amd64.iso to select it. Then click Open.
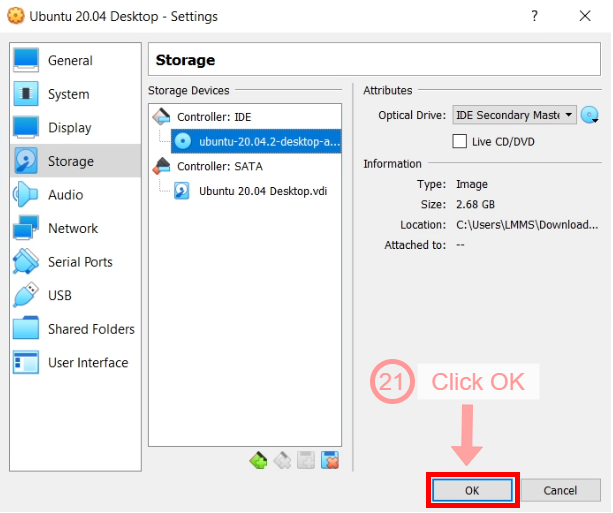
It will then go back to the Storage Settings, this time the ubuntu-20.04.x-desktop-amd64.iso image is now loaded on the Optical Drive.
Click OK.
Installation of Ubuntu 20.04 LTS Desktop to the new Virtual Machine
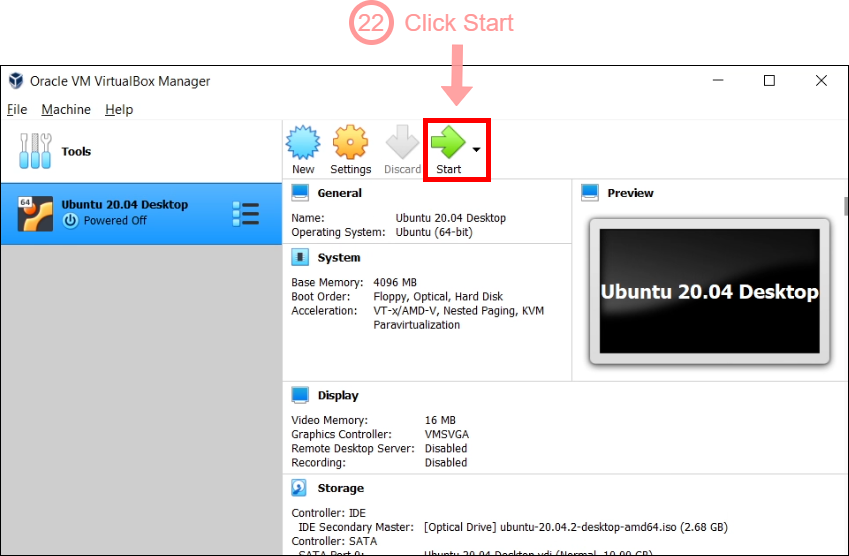
To start the installation of Ubuntu 20.04 LTS Focal Fossa Desktop, click on Start.
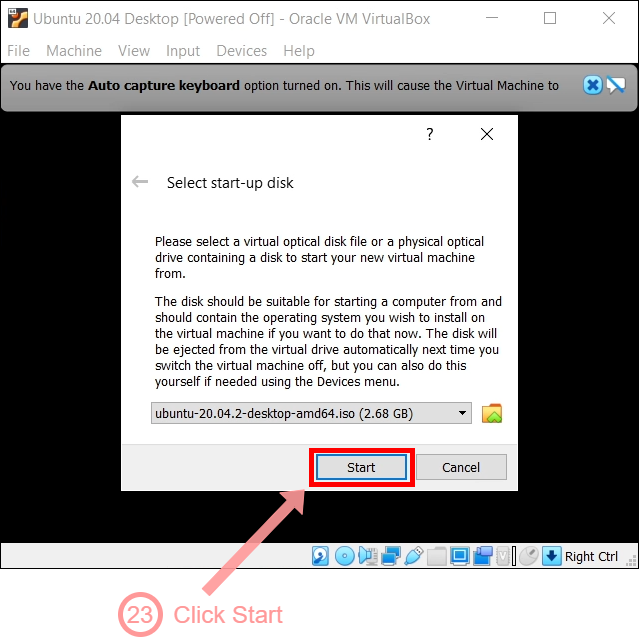
It will then ask you to Select start-up disk. Click on Start.
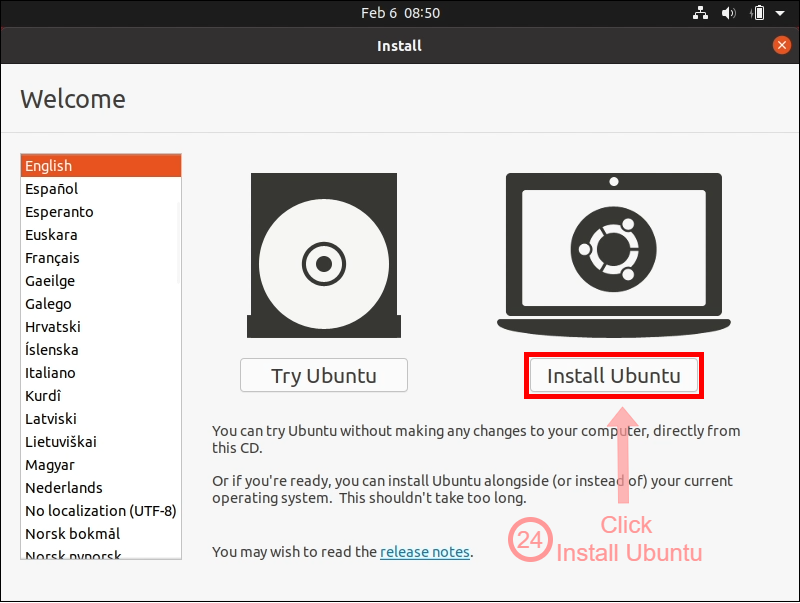
Wait for checking disks to finish and until you reach the Install window.
Click Install Ubuntu.
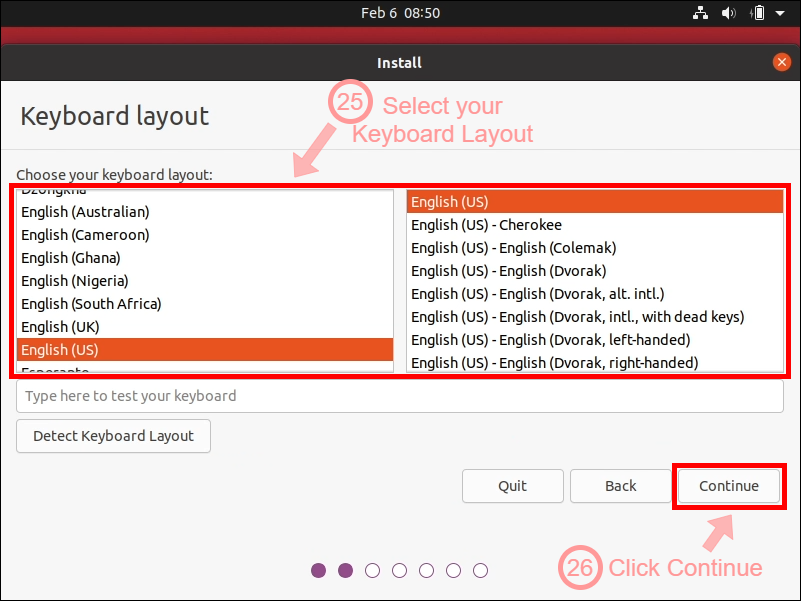
Select your Keyboard layout, then click Continue.
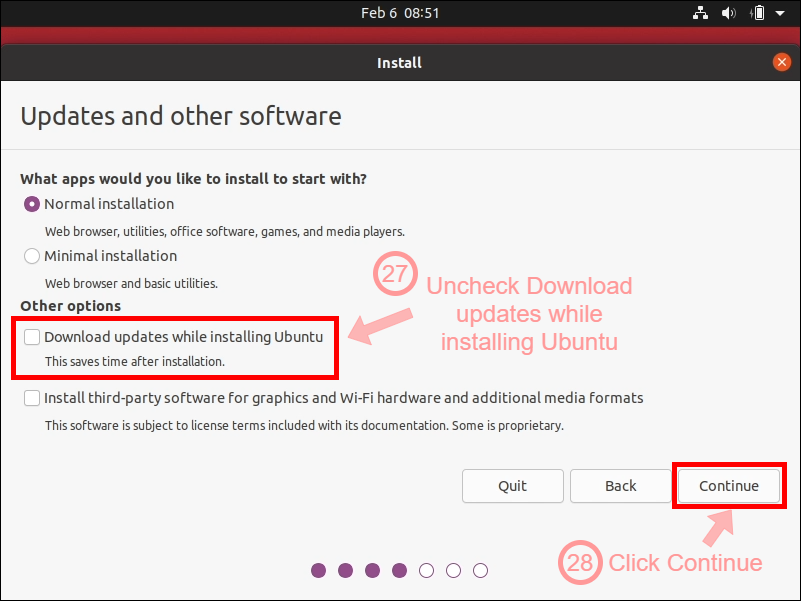
On updates and other software, uncheck the Download updates while installing Ubuntu. This is to speed up the installation process.
Click Continue.
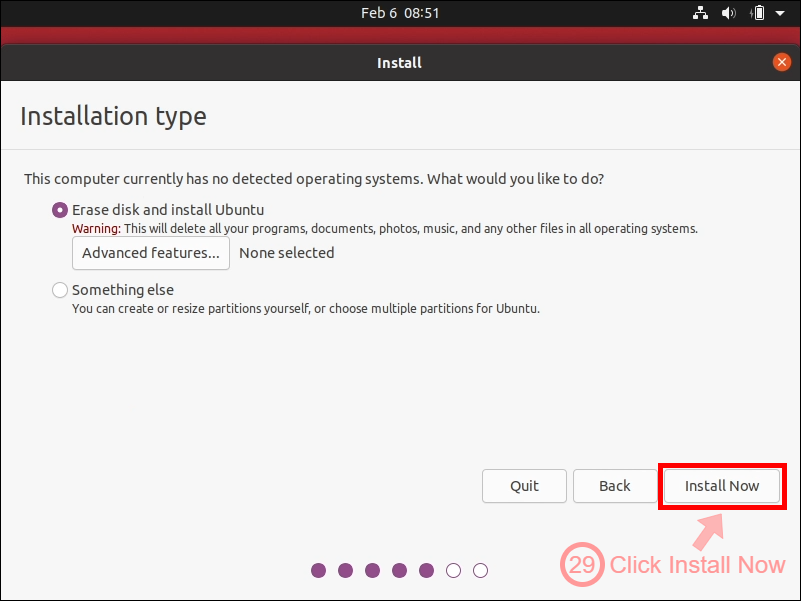
On Installation type, leave the option on Erase disk and install Ubuntu. Then click Install Now.
Note: This will not erase the disk of your host computer, but this will erase the disk of the new Virtual Machine, so its okay to erase disk.
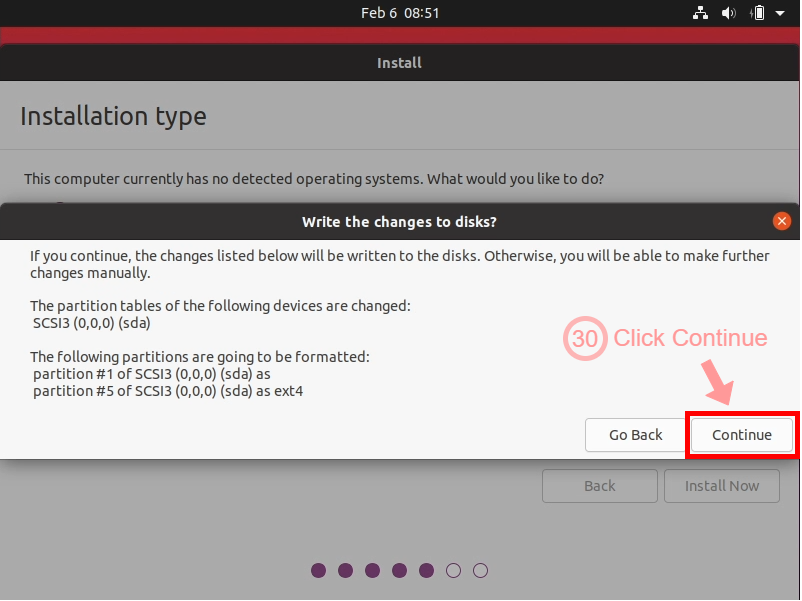
A window will appear showing the changes that will be made to the disk. Click Continue.
This will start the installation process in the background.
While the installation is being done, there will be some information that will be asked.
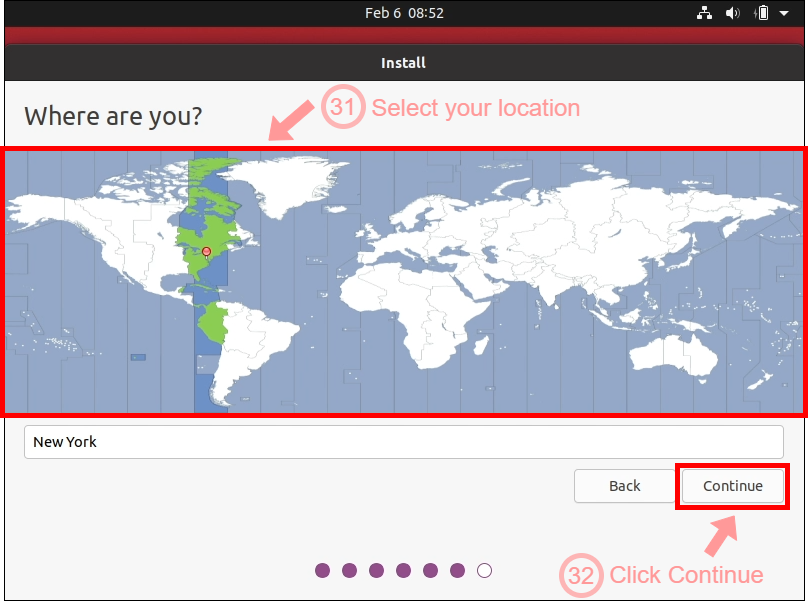
Select your location to set the clock timezone. Then click Continue.
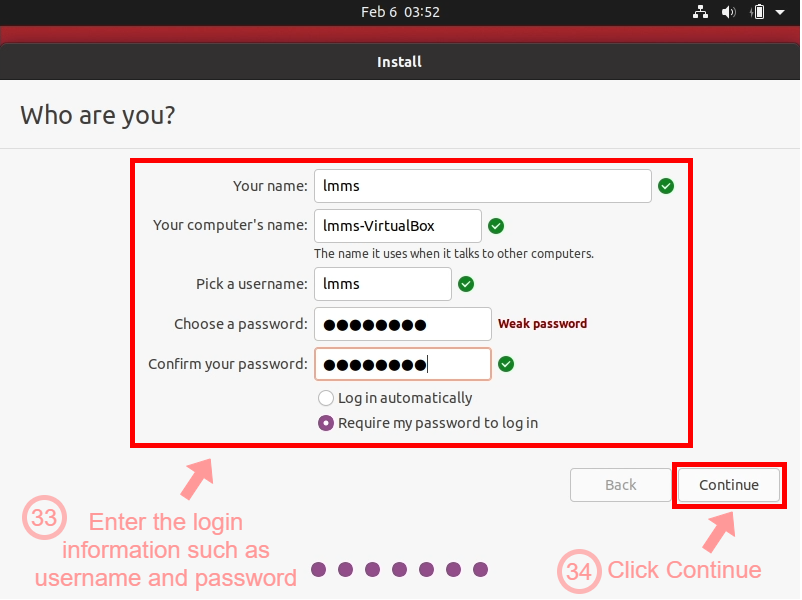
Enter the login information being asked.
- Your name (can be any name)
- Your computer’s name – this will be automatically filled up when you enter Your name. You may change it if you want.
- Username
- Password
Then click Continue.
Since we have provided all the information being asked, the next step is to wait for the installation to finish.
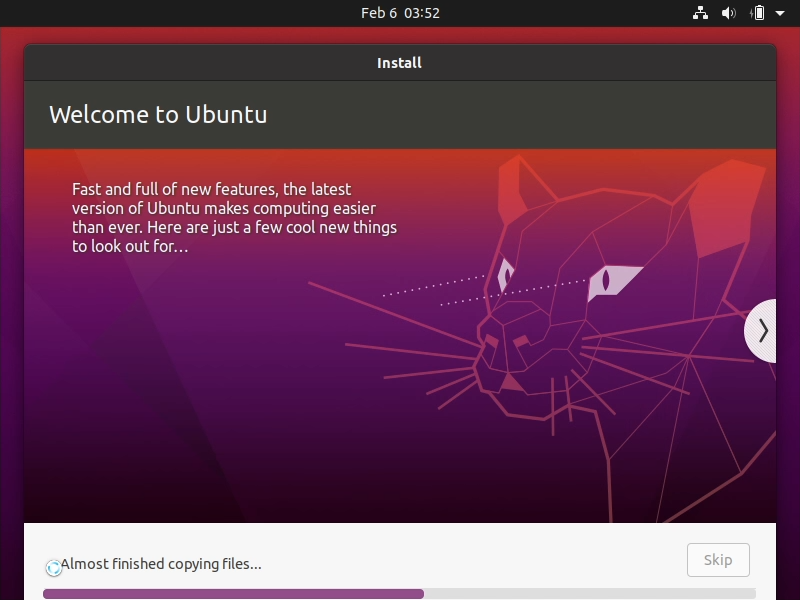
Depending on the speed of your computer this might take a while.
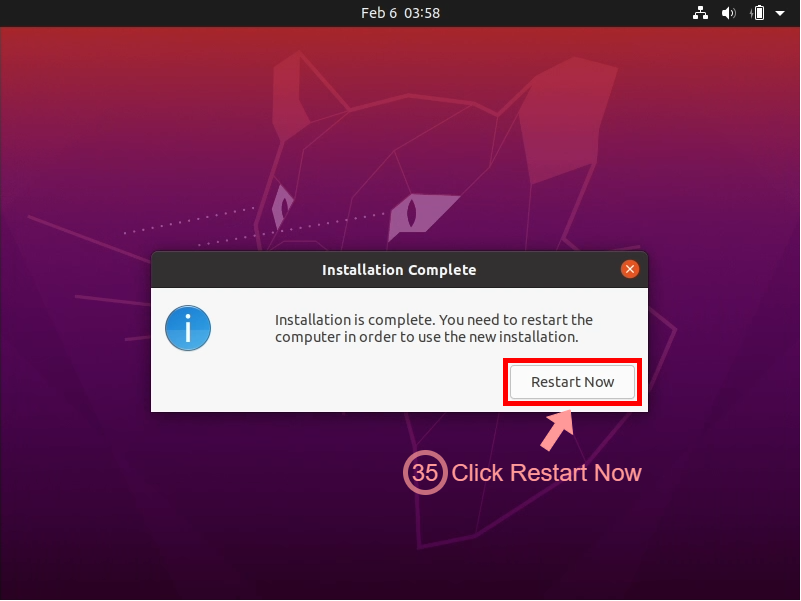
Once installation is complete, click Restart Now.
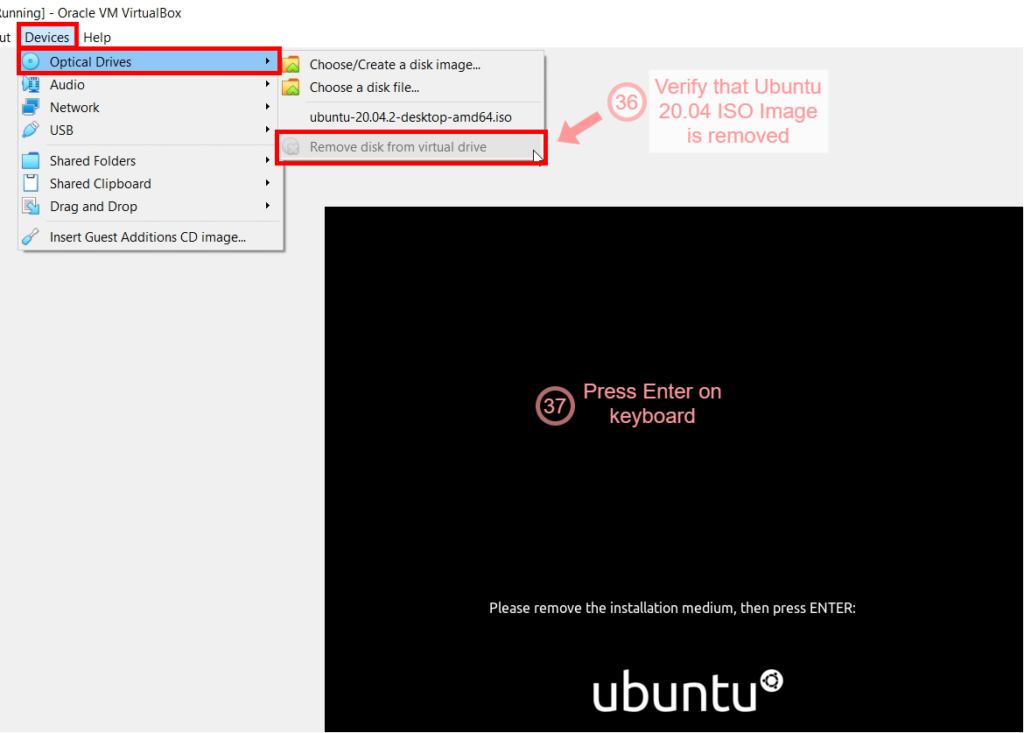
Verify that the ubuntu-20.04.x-desktop-amd64.iso image is already removed from the Optical Drive by going to Devices >> Optical Drives. If Remove disk from virtual drive is grayed out, then the installation medium is already removed.
In my case, it was automatically removed by VirtualBox.
Press Enter on the keyboard to restart the Virtual Machine.
This time the Virtual Machine using Ubuntu 20.04 Desktop installed.
Running Installed Ubuntu 20.04 LTS Desktop for the first time
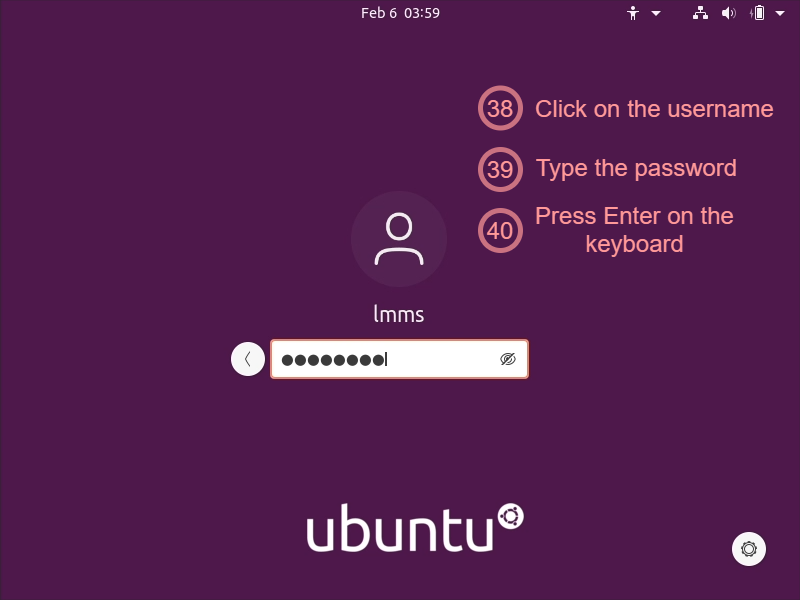
It will then go to the login screen. Click on the username that you entered earlier, type the password, then press Enter on the keyboard.
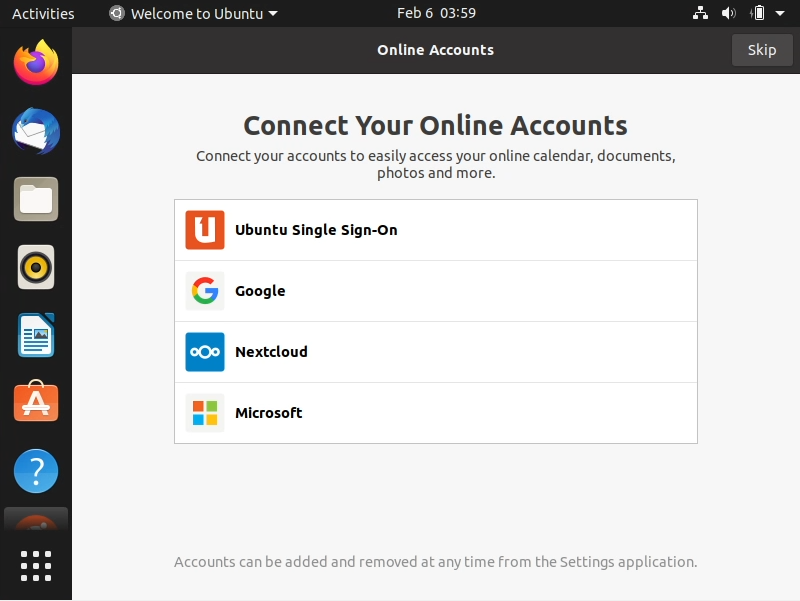
Once logged in, the Welcome to Ubuntu window appears. Just press Skip, keep on pressing Next until it says You’re ready to go! Then click Done.
Once the Welcome to Ubuntu screen is gone, you are now shown the Ubuntu Desktop.
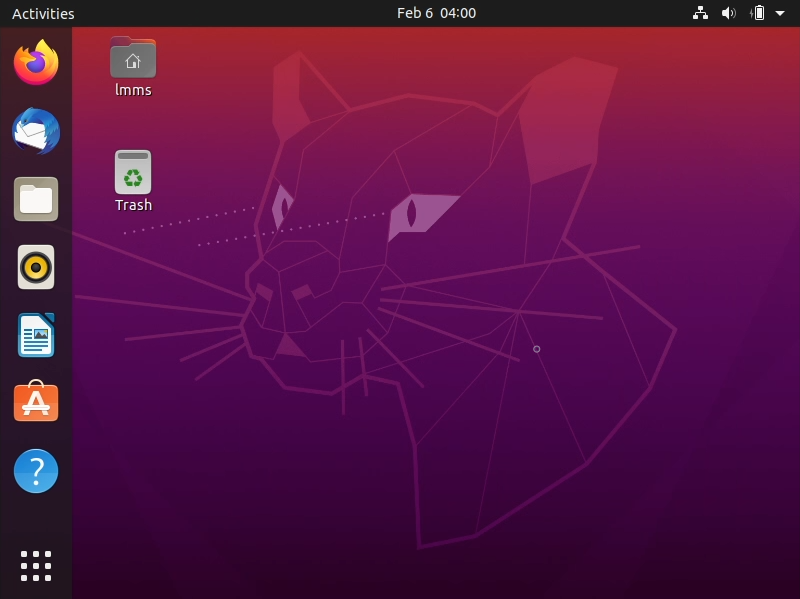
With this we have successfully installed Ubuntu 20.04 Desktop in VirtualBox.
Next thing that I recommend to do are the following.
- Update Ubuntu 20.04 LTS to the latest packages
- Install VirtualBox Guest Additions for additional functionality
We hope this helps you run Ubuntu 20.04 (LTS Focal Fossa) Desktop in your VirtualBox.